本文介绍在linux环境下安装部署nginx,希望大家留言相互学习交流。
安装编译工具库
yum -y install make zlib zlib–devel gcc–c++ libtool openssl openssl–devel
创建安装目录
mkdir /usr/local/nginx

cd /usr/local/nginx
下载nginx,并安装
下载
wget http://nginx.org/download/nginx-1.15.6.tar.gz

解压
tar -zxvf nginx-1.15.6.tar.gz

进入解压文件夹
cd nginx-1.15.6

编译
./configure --prefix=/usr/local/nginx --with-http_stub_status_module --with-http_ssl_module

安装
make && make install
操作指令
启动
/usr/local/nginx/sbin/nginx

关闭
/usr/local/nginx/sbin/nginx -s stop

重启
/usr/local/nginx/sbin/nginx -s reload

杀进程关闭
用指令查看进程:ps -ef|grep nginx
杀死进程
kill -9 进程id

查看版本
/usr/local/nginx/sbin/nginx -v

验证配置文件
/usr/local/nginx/sbin/nginx -t

重新加载配置文件
/usr/local/nginx/sbin/nginx -s reload
负载均衡配置修改,实现分发
conf目录下的nginx.conf文件是nginx的配置文件,我们在这里配置负载均衡
下面给出配置文件:
http {
    include mime.types;
    default_type application/octet-stream;
    sendfile on;
    keepalive_timeout 65;

    #这里是您需要修改的地方,修改为您的服务器IP:端口号
    upstream backend{
        server 192.168.1.160:8080 weight=1;
        server 192.168.1.161:8080 weight=1;
    }
    server {
        listen 80;
        server_name localhost;
        location / {
            root   html;
            index  index.html index.htm;
            proxy_redirect off;
            #保留用户真实信息
            proxy_set_header Host $host;
            proxy_set_header X-Real-IP $remote_addr;
            proxy_set_header X-Forwarded-For $proxy_add_x_forwarded_for;
            proxy_pass http://backend;
        }
    }
}
nginx+php配置部署
编辑nginx.config文件,修改以下内容:
vi  nginx.config

location / {
    root   html;
    index  index.php index.html index.htm;

     #Location模块中追加,解决固定连接切换找不到页面问题
    if (-f $request_filename/index.html){
        rewrite (.*) $1/index.html break;
    }

    if (-f $request_filename/index.php){
        rewrite (.*) $1/index.php;
    }

    if (!-f $request_filename){
        rewrite (.*) /index.php;
    }
}


location ~ \.php$ {
    root          /usr/local/nginx/html;
    fastcgi_pass   127.0.0.1:9000;
    #fastcgi_pass  unix:/var/run/php5-fpm.sock;
    fastcgi_index  index.php;
    fastcgi_param  SCRIPT_FILENAME  /usr/local/nginx/html/$fastcgi_script_name;
    include        fastcgi_params;
}

参数解释
  location 正则匹配到以php结尾的到这里解析,
  root 指明了网站目录
  fastcgi_pass 指明了用哪里的php-fpm来解析
  fastcgi_index 指明首页
  fastcgi_param 指明的是php动态程序的主目录,/scripts也就是$fastcgi_script_name前面指定的路径,我们一般在这里写网站根目录的路径,比如我们的路径是 /usr/local/nginx/html。

检查配置:
/usr/local/nginx/sbin/nginx -t

创建并编辑首页展示界面
 vi index.php
添加
<?php phpinfo(); ?>

在浏览器中输入ip:端口或者ip:端口/index.php
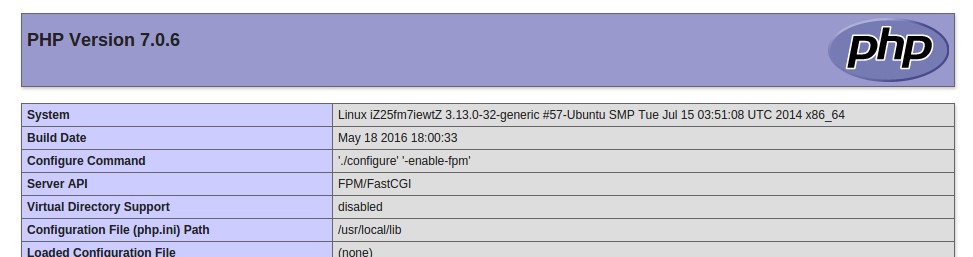
看到此界面标识nginx配置php成功…
nginx配置开机启动
在/etc/init.d/目录下创建文件nginx:
vim  /etc/init.d/nginx

nginx文件内容如下:
#!/bin/bash
# nginx Startup script for the Nginx HTTP Server
# it is v.0.0.2 version.
# chkconfig: - 85 15
# description: Nginx is a high-performance web and proxy server.
#              It has a lot of features, but it's not for everyone.
# processname: nginx
# pidfile: /var/run/nginx.pid
# config: /usr/local/nginx/conf/nginx.conf

nginxd=/usr/local/nginx/sbin/nginx        # 你的nginx真实启动文件路径
nginx_config=/usr/local/nginx/conf/nginx.conf    # nginx相关配置文件路径
nginx_pid=/var/run/nginx.pid
RETVAL=0
prog="nginx"
# Source function library.
. /etc/rc.d/init.d/functions
# Source networking configuration.
. /etc/sysconfig/network
# Check that networking is up.
[ ${NETWORKING} = "no" ] && exit 0
[ -x $nginxd ] || exit 0
# Start nginx daemons functions.
start() {
    if [ -e $nginx_pid ];then
       echo "nginx already running...."
   exit 1
    fi
       echo -n $"Starting $prog: "
       daemon $nginxd -c ${nginx_config}
   RETVAL=$?
   echo
       [ $RETVAL = 0 ] && touch /var/lock/subsys/nginx
   return $RETVAL
}

# Stop nginx daemons functions.
stop() {
    echo -n $"Stopping $prog: "
    killproc $nginxd
    RETVAL=$?
    echo
    [ $RETVAL = 0 ] && rm -f /var/lock/subsys/nginx /var/run/nginx.pid
}

# reload nginx service functions.
reload() {
    echo -n $"Reloading $prog: "
    #kill -HUP `cat ${nginx_pid}`
    killproc $nginxd -HUP
    RETVAL=$?
    echo
}

# See how we were called.
    case "$1" in
start)
    start
    ;;
stop)
    stop
    ;;
reload)
    reload
    ;;
restart)
    stop
    start
    ;;
status)
    status $prog
    RETVAL=$?
    ;;
*)
    echo $"Usage: $prog {start|stop|restart|reload|status|help}"
    exit 1
esac
exit $RETVAL

保存退出....

文件授权:
chmod 755 /etc/init.d/nginx

为nginx加上service相关命令权限
chkconfig --add nginx
chkconfig nginx on

完成配置...